Do you have any plans to build a trailer gate? And you bought all the steel, welding wire, tank of compressed gas for your welder? It is great. But the confusion is how to build it. Then you have come to the right place.
Let’s know about how to build a trailer gate. If you are a beginner welder and you are experienced with all this stuff already, it is helpful for you. You have a decent 230 volt MIG with the amperage. You need to get some good weld penetration and keep practicing for your better skills. When you can achieve decent weld penetration, now you are ready for a project. If you are not sure of your welding quality, check with any experienced welder over your welds.
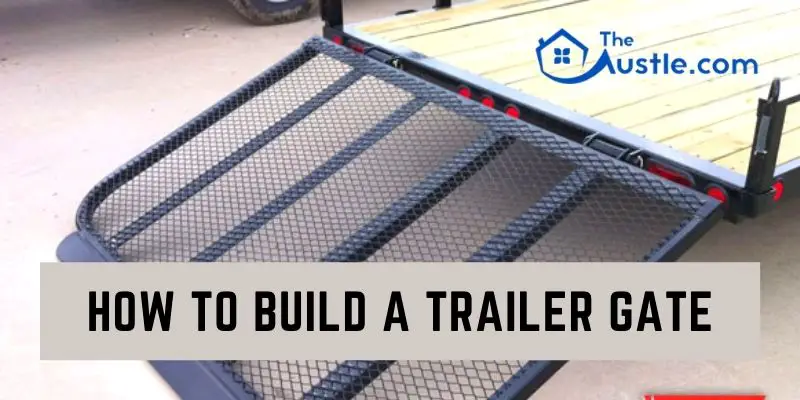
So, no need to worry about it, Here we will provide the best direction for you How to build a trailer gate. And this article will help you to find out your best information.
Let’s give some description below.
How To Build A Trailer Gate
In this part, we will mention the stepwise guidelines about how to build a trailer gate.
Step 1: Cut the parts accurately
It is important to cut the parts accurately length and angles. When you are cutting all the parts correctly, Put it all together. Otherwise, anyone can be lost.
Step 2: Square up the entire ramp
First of all, you square up the trailer frame for the build of a trailer ramp gate. A vice grip is essential to each corner and holds your trailer frame in place, but it is not enough with the piece. You can accurately measure the diagonal of the trailer frame.
You note the measurement perfectly, then accurately measures the 2nd diagonal of the trailer frame with vice gripe you can easily adjust the trailer frame until both diagonals measure the same.
Step 3: Tack weld first
First tack welding everything. With tack welding, you can quickly build your trailer ramp gate because it will give you a proper adjustment. You can see the overall shape with tack welding. Before welding, you can make any adjustments you need. This step is constructive for tack welding.
Step 4: Place the cross members
Where you place the cross members, it is also important, especially when your ramp is load with heavy machinery. Plan to roll up your machinery centered over your ramp for maximum space when you are loading.
Measure your mower front side and other plants between the front tires. You centered the measurement over your ramp, and this step will help determine where the wheels of your machinery would roll-up.
And your trailer ramp will get support where you place the cross members. You plan for two cross members, but you may need three or four cross members better work for your trailer ramp gate.
Step 5: Adding the cross members
When you add the cross members on your trailer ramp gate, first of all, you put the angle iron flat side onto the frame and tack weld the cross members. Then you can see the maximum surface area for when you come to weld on your trailer ramp deck fully.
Step 6: Putting the utility trailer ramp hinges together
We hope so you are making your hinges and not using any hinge you have purchase. Follow the cutting piping to the length and ends of the deburr, so they are smooth. This step is very more comfortable for your hinge pieces to glide past each other and work the first time smoothly.
Put the steel rod through the four-inch middle section and the schedule 40 piping, the four-inch piping from the center of your hinge. Now another side put the piping section on the steel rod and attached it from the center.
The hinge work to end of the pipe pieces staying fixed in place to the rod, and the pipe piece and the rod move together.
Now the center hinge piece welded to your ramp, and your ramp smoothly goes up and down.
Step 7: Placing your utility ramp hinges
Placing your ramp hinges when moving heavy materials up the ramp would be where the wheels of the materials would run. If you follow this step, then you can place the hinge on the trailer ramp properly.
Step 8: Welding the hinge to the trailer frame
When you come to weld your trailer ramp hinge in place, you weld fixed end pieces along the top and underside of your trailer, only welded the end hinge piece of your trailer gate. Carefully doing the welding; otherwise, your hinge won’t work.
Step 9: Using sheet metal
When you decide to use sheet metal, you can choose 14, 12, or 10 gauge sheet metal, but depending on how firm you want for flooring.
Weld floor sheet metal suitably around the top and underside of the frame, and also weld the floor underneath for the cross members.
Step 10: Using regular expended metal for flooring
Regular expended metal is one of the best for your trailer ramp flooring. Regular expanded metal is very sharp. When welding your expended iron sheet to the frame, you can get the maximum space for welding.
Step 11: Final welds
After all the adjustments, now you are ready for the full welds. Weld everything up correctly. Weld fully all the corners and ramp both sides. Weld the hinges correctly, and then you can see the full trailer gate, but remember it when you are not sure to get someone more experienced to check out your welds.
With the help of the above description, you gain lots of information about How to build a trailer gate.
Final Thoughts
This article is all about How to build a trailer gate. Now we can assure you are reading this article, and you can find out to make a decision and learn easy methods to do how to build a trailer gate.