Are you looking for a solution on how to build trimmer racks for trailers? Want something that fits in your budget? Spent thousands of dollars buying trimmer racks, still couldn’t prevent them from being stolen? If the answers to all the above questions are yes, then the article is for you.
All-equipped trimmer racks are so expensive, whether you buy it from Amazon or from somewhere else. Undoubtedly, those works like magic with every possible facility you can count. Despite spending so many dollars on buying those trimmers, they get rusty; or get stolen.
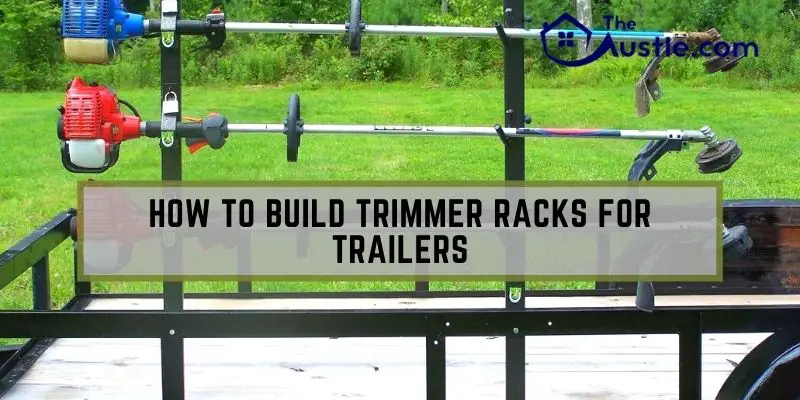
Why spend so many dollars buying trimmer racks when you can build one by yourself? In this article, I will tell you how to build trimmer racks for trailers at home, only at $50. Let’s know more about it.
How To Build Trimmer Racks for Trailers at Home
You can buy the latest model trimmer racks, all packed with the latest technology. Those claims to have fully adjustable motor support that ensure you won’t have any bouncing motor issues; or spilling oil issues. Those have a combination lock or keypad lock to prevent stealing the motor. But those trimmer racks are way expensive.
Nevertheless, consumers complain about stealing, despite the techno-locks those trimmer racks offer. After spending so much money on those trimmer racks, consumers tend to question how to build trimmer racks for trailers at home?
Why waste hundreds of dollars on buying trimmer racks? You can build one by yourself at home with everything handy. The process will cost you not more than $50. Yes, within $50. How? Just follow the steps.
Materials You Will Need
- 2-by-60-by -3/4-inch oak lumber (2);
- 3-by-60- by-3/4-inch oak lumber (2);
- Variable speed drill;
- 5/16 inch drill bit;
- Rubber clamps with screws (8);
- Phillips head screw tip;
- 5/16-by-2-inch bolts with nuts (8);
- 5/16-by-2-inch u-bolts with washer and nuts (2);
- And a Wrench.
Procedure to Follow
Following these easy procedures below, you can build trimmer racks for your trailer:
Step 1: First, make sure to use solid oak or any other durable wood which can contain all the materials.
Step 2: You need clamps to place and remove the trimmers on the rack. Choose the clamps that make the work easy.
Step 3: For assembly, prepare the vertical pieces first. Put the two parts of the lumber measuring 2-by-60-by-3/4-inch flat on the work table. Take a measure from the ends of the parts and mark on 1 and 2 inches. Then mark on those marks that are 1-1/2 inches from the long sides.
After that, drill a 5/16-inch hole into pieces exactly on the point where two marks cross.
Step 4: Now prepare the horizontal pieces. Mark and drill the adjusting holes on them. Put the two parts of a 3-by-60-by-3/4-inch lumber flat on the table. Take a measure from one end and every inch of the lumber. First, put the combination square on the marks and then draw lines across the lumber’s 3-inch side.
Mark each line an inch away from long sides. Then drill 5/16-inch hole on the point where the marks and the lines cross each other.
Step 5: Now attach the rubber clamps. Take a measure from one end of the vertical pieces and mark every 12 inches on one of the 2-inch sides. Put a combination square on the marks and draw a line across the lumber. Mark the line 1-inch away from the long sides.
Secure the clamps with screws on the point where marks and the lines cross.
Step 6: It’s time to assemble the rack. First, set the vertical pieces on top of the horizontal pieces. Then align the holes in each piece, so the distance between the vertical pieces is proportionate. Secure them with the 5/16- inch bolts and nuts.
Step 7: Now secure the rack to the trailer. Stand the trimmer rack straight up on the side of the trailer. Slip the square u-bolt through the trailer side and into the holes drilled in the horizontal pieces. Then put the washer over the threads of the u-bolt. Tighten the rack with nuts to the trailer.
Extra Caution
- You can secure padlocks with each point where the vertical and horizontal pieces cross each other, to prevent the trimmer from being stolen.
- To prevent rust, seal the rack with water sealer or use an exterior-grade clear coat on the rack.
- To ensure a more permanent assembly, better install neoprene nuts.
Conclusion
It’s easy to build homemade trimmer racks for the trailer. And you don’t have to spend more than $50. Most of the all-equipped trimmer racks are highly expensive. If those don’t fit into your budget or want to cut expenses, why don’t you build your own?
You can build your trimmer racks with all the materials available in your household. But you have to keep children away from power tools to prevent accidents while building trimmer racks.
At the end of the article, I am sure you got your answer on how to build trimmer racks for trailers at home. So, start building your own and save some money.
- How To Get Rid Of Thorn Plants? 7 Best Ways
- Want To Know How To Mow Steep Ditches? 5 Best Tips
- How to Remove Stuck PTO Clutch – 3 Exciting and Enjoyable Types
- How To Re-deck A Trailer – A Step By Step Guide in 8 Easy Steps
- How to clean pool deck – 5 Easy Steps
- How To Keep Sod From Dying – 7 Best Steps
- How to Wire Lights on Zero Turn Mower in 11 Best Steps