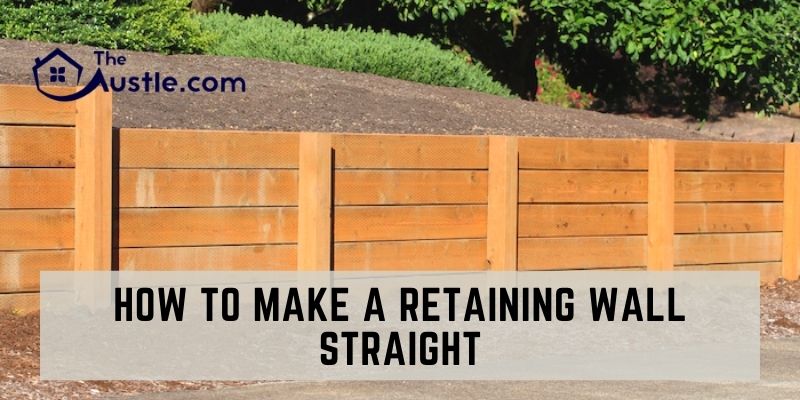
How to make a retaining wall straight would be one of the practical guidelines for your living zone and capacity. Making a retaining wall straight will help decrease loss, increase the expulsion of aquatic side and generate the efficient lawn way.
It’s a distinguished residence-growth venture that can be accomplished within 7 or 8 days. The next feature is a guideline which will assist you in making your retainer wall. Together with the steps, we will offer you tricks and tips.
Retaining your wall straight will converting your plot and rise your workspace. So, it would be a great decision if you are looking for any countryside view along with the firm construction.
How to Make a Retaining Wall Straight in Simple Way
A retaining wall is used to avert a hill from wearing away or making a level outward for a yard or lawn. Once retaining wall is made, it slants little bit to one side for recovering the expulsion.
Firstly, we need to make the slope smooth before making the wall. Making a compressed foundation for our wall can help confirm that it would be firm. Let’s start with the things you need and the gradual steps of how to make a retaining wall straight.
Step 1: Required tools and materials
- Equipment needs in your side:
- Laser level
- Spade
- Pick
- Plugging gun
- Rubber hammer
- Pebbles
- Rod
- Mason twine
- Cap block
- Wall block
- Landscape stuff
Step 2: Scheme of the whole task
Selecting the place of your wall, and wall stakes should be the initial step of your work. Drive the mason line powerfully between the stakes. Then, grip the sequence level with the stakes. Make it a level.
Now we need to measure the block on wards to backward. The next task is digging a channel more than 3 inches. We must make sure we have space for gravel in onward and backward of the blocks to let water to pass. Next step is digging the channel deep, which is around 1-2 inches.
Step 3: Block setup
We need to interlock all the blocks. Blocks may have the opening at backward which means to grip the posterior of the block beneath it. And retain it from slipping.
It maintains the wall’s mightiness and lets it to endure from the pressure of the weight of total filth. The last block row is in subtle level and ability to move about if the opening is withdrawn. For that, we need the pick to break the opening from each block.
Step 4: Leveling of the block
After leveling the first block onto the filled pebbles, put the destroyed level on the upper part of the block. Connect and remove the pebbles from the below block until it is flat.
Hit the top of the block with a rubber hammer. The more you do, the more would be quick at this. Check twice to confirm the block is in line with the string.
Step 5: Accumulation of blocks
Set the following block the together with the below side as the first one we leveled. Now utilize the destroyed level on the boundaries of both blocks to decide if the fresh block is in the equal level or not.
Connect or take away the pebbles till the both linking ends are at the equal stature. Then set the level at the core of the block and Connect or take away the stones till it is balanced. The ending of both blocks must be checked once for ensuring as these are in equal.
Step 6: Make equal with pebbles
If you feel to dig deeper the place of the block level, you may think to increase the level of your wall or down, relevant to your countryside. For doing this, adjust the row and place pebbles all over the block.
In place of insertion of the next block, please keep it on the top location of it. Seal the bottom with pebbles and flat with fresh upper block.
Step 7: Placing of countryside stuff
When the first row is finished with flat and equal kind, seal the bare space at the back of the wall with pebbles. Place your countryside stuff at the height of the block and set the next row of blocks at the surface, so it grips the thing down. Make certain that the bricks could move slightly.
Step 8: Filling with pebbles and mud
Set the pebbles alongside the wall which is inside of countryside stuff till it touches the height of the wall. Now set mud contrariwise for leveling up the ground at the equal level. When they are leveled, we can set the following line of bricks. When this line is done, we will repeat the pebbles and mud fulfillment.
Step 9: Smooth covers for finishing look
For the fine finishing look, we may add smooth coats at the top of the wall. This cover is just a firm tangible block. It would not have an opening that we need to glue it with cement at the roof of the block.
Step 10: Let the wall to dry
So this is the final look you got after completing all step by step work. For your souls, satisfaction rechecks the entire wall as everything is perfectly lined up. When you are all set, just let the whole thing dry. And keep it around 7 or 8 days. After that, you can use the retaining wall.
Conclusion
Whether you’re a beginner or an expert, your finished work will give you the satisfaction. To make your lawn journey fine our all writing is dedicated. How to make a retaining wall straight is one of those where you will get full assurance of quality, we believe.
Just make sure your all the materials are alright. This tip will lead you much more ahead than anyone. When you make the retaining wall by own it would be appreciated and enthusiastic.
- How To Change Blades On A Grasshopper Mower
- How To Get 100 Lawn Care Customers
- How to keep cars off grass with few smart steps
- How To Grow Bermuda Grass In Clay Soil
- How to remove dead grass from your lawn to make it clean and attractive
- How to catch a chipmunk with a bucket of water
- Know How To Charge For Bush Hogging