Many of you may not know what Belgium blocks are. May they also don’t know how to put mortar between Belgium blocks? Then surely you are going to get some right information about this through this article. Belgium is a type of stone, which decorate on both sides of the road. Roads, courtyards, giant trees, paved roadblocks with rocks.
Belgium stones first brought from the city of Belgium. That’s why the name Belgium coincides with the name of the town. That is why many people do these things even as a hobby. Today we will find out in this article how to put mortar between belgium blocks.
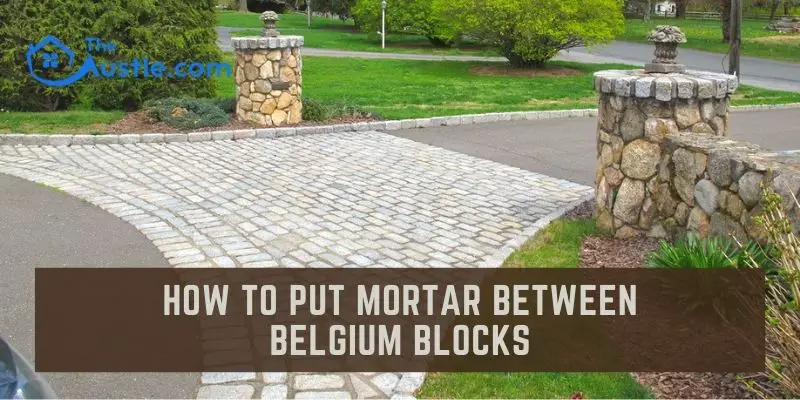
How To Put Mortar Between Belgium Blocks- 13 Easy Ways To Make
How to put mortar between Belgium blocks, to know this, we need to understand what is mortar? What are Belgium blocks, and how can they be applied?
Mortar
The mortarium is the origin of mortar. Which means crushed. It creates a bond between the bricks and the stone concretes. Belgium blocks stick together like cement when attached.
Belgium Blocks
The term originated 200 to 500 years ago. Long ago, ships carried stones. It then places on the shores of the port. Then its use gradually increased. However, due to their high cost, their use has not increased in many places. I will learn how to place mortar in Belgium blocks.
1. Measurement Of Stone
The stones become a specific size. It is usually 11 × 5 × 4 in size. Each of which costs about.
2. Keep The Line Straight
If the place where you want to place the Belgium blocks first is crooked, it will be challenging to set the stones during the work. So we will arrange to draw the line straight before setting the stone.
- You have to nail one end of the road in this regard. In the same way, you have to nail the other side.
- Then it will be easier to keep the line straight by tying the thread with the nail.
3. Draw Lines On The Line
Just nailing the ribbon to the line will not end the work. Then you have to draw the line to mark the route. In this case, our work will benefit.
4. Cut Off Excess Road
Then the way will need to be cut evenly. He needs a concrete saw. With the help of which the concrete way can cut straight. Belgium blocks can never well place on curved roads.
5. Unnecessary Cement Must Remove
Who has to remove the extra parts that were cut by the machine. If it is not possible to move it by hand, a spade can use. With the help of a shovel, the bare parts have to be removed by pulling. After cutting the cement, we will push the excess adhesive through one of the tools. These will separate the glue from the soil. It will easier for us to remove the excess glue.
6. Easy Way To Remove Glue
It can easily cut by a machine, but it is not easy to remove. We will try to remove it quickly. That way, we can first take a hard hammer to break up this excess cement. We can break it into small pieces. I can cut it about a foot long. I will start breaking the glue by hitting them with a hammer.
- We can transfer this broken cement by contacting the people who have these broken types of cement without wasting space by throwing garbage.
7. Dirt Should Clean
If you want to do any work well, you must clean the place. So after removing this cement from that place, a lot of garbage falls. The dirt has to clean before starting work.
8. Hole Digging
Then, you have to dig a hole with a spade. The place where we want to make Belgium blocks has to make some holes.
9. Mortar Addition
I will spread the mortar well where I want to place the Belgium blocks. This work must do very carefully. These because when it not mixed well when adding mortar, it will remain empty in different places. As a result, the Belgium blocks will move or rise in a short time. As a result, all the troubles will be in vain. So we will try to be careful while laying the
10. Blocks Must Place
At this stage, the blocks have to put along the roads. Each block must place evenly. Care should take so that it does not go up and down. If it is high and low, it will not look good at all. So the blocks have to be placed slowly with patience over time. The rope that previously tied to the nail will help you a lot in this work. Blogs are less likely to be crooked or upside down if the blocks placed following this rope.
11. Mortar Should Put In The Neighborhood
At this stage, I will know how to get stuck in the blocks with the help of mortar. Make sure the mortars apply well to the blocks. The blocks cannot remove for this mortar.
12. Uses of Belgium Blocks
When the cannon well place in the Belgium blocks, there is a small amount of dirt on it. In that case, it is beneficial to use a small broom. If we lightly shake off the mortar, the dust on it will remove. These mortars can take a whole week to dry thoroughly. That, of course, will depend on the weather.
13. Additional Beauty Enhancement
The beauty has further enhanced the place where Belgium blocks to place. We can enhance its beauty in many ways. For example, after the border dries well, we can plant some flowering trees on both sides of the road. The flowers are so beautiful to look at. It combines with the beauty of the block to make the environment more pleasant. We can use hand gloves to do all this work. It will protect the hand from dirt.
Conclusion
Finally, we can say that Belgium blocks enhance road safety as well as road beauty. If we want, we can use this method to place mortar in the Belgium blocks. However, this responsibility can give to a commercial organization or an experienced company for the road. They will try to make the work more beautiful through their experience.
In that case, the whole thing will be a bit expensive. However, if we want, we can increase the beauty by putting Belgium blocks in our yard. So through the above discussion, we know how to put mortar between belgium blocks. So if you need a good idea about these things, read this article.
- Learn 3 Best Solutions of How To Dry Out Dirt!
- The Secret Of Successful How To Kill A Mulberry Tree
- Best 7 Ideas To Know – How To Bid Mulch Jobs
- How To Change Blades On A Grasshopper Mower
- How To Get 100 Lawn Care Customers
- How to Make a Retaining Wall Straight in a Simple Way
- How to keep cars off grass with few smart steps