Do you want to remove the PTO clutch on a cub cadet? But don’t know, and if you are searching the ways to learn how to remove the PTO clutch on a cub cadet, this article is for you. When the grass grows big, it’s should mowing the lawns of the garden.
If you have the best mower, this work will be easy to do. The cub cadet makes it easy by its outstanding works. But sometimes you should look after your cub cadet. When your cub cadet doesn’t work as well, and the PTO clutch is the reason for it, you should remove it. Stay with us to know the process by our guidance in detail.
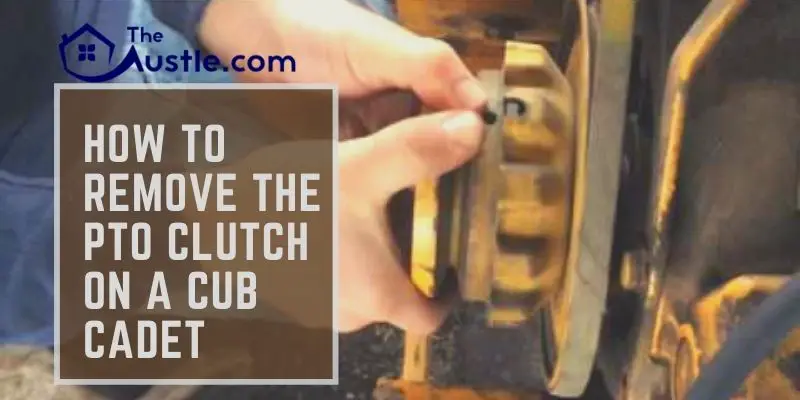
How To Remove The PTO Clutch On A Cub Cadet
PTO clutch is one of the most essential part in a cub cadet. If it’s not working well or something else, you should remove or replace it. To remove the PTO clutch is a little challenging, but not so hard. If you have a good knowledge of your machines and also about every part of the device, then it’s easy to do.
Don’t worry we will help you with this work as we can. Follow the ways to know how to remove the PTO clutch on a cub cadet.
Step 1:Tools,Equipment & Safety
At first, you will need some tools for opening the clutch. Before starting the work, make sure all the tools are close at hand. You also need some equipment, like a welding machine, screws, etc.
Don’t forget to take safety goggles for your safety. And the vital thing you must have good knowledge of all the tools, equipment and also about their usage. If you want you can take someone help who have done it before
Step 2:Switching Off, Removing Side Panels & Disconnecting Headlights
Now take your machine in a safe place, where you want to do the work and also take all the necessary things you need in this job. Now it’s time to starting the work. First, check the engine of the cub cadet is off or not; if not, then keep it in the off.
Then you should remove the side panels first by the useful tools and disconnect the headlights. If the lights are already disconnected, you don’t need to do or try.
Step 3:Removing Buffer Up, Grip, Disc & Nuts
At this stage, you should remove the buffer up. It is attached to the two shocks in the two sides. You should remove them first by using the 9/16 Socket. Then put off the grip and open the disc. There have some nuts on the grip, and you must put them out. Some pins are also there for removing. Be careful more at this step.
In this step, maybe you might use a welding machine if the nuts and grips are tarnishing. Wear your safety goggle when you are using the welding machine. Because in the time of using a tool, it creates the flame of fire, which makes grip and nuts are gradually softening. That makes your work easy.
Step 4:Removing PTO Clutch
After removing all the grip and disc, you will find a cable connection with a clutch. It would help if you disconnected the cable. There have some washers-screw in the bolt of the clutch. Remove all the washers-screw from the bolt by carefully. You can use an air-hammer for removing them. After that, you will able to remove the PTO clutch.
In this whole working time, you should be very careful in every step. Being careless and a little mistake can cause a big accident. If you want to get better work from your cub cadet, you must look after it well and take care of it.
You should check every small instrument of your cub cadet, at least one day in a week. If you find any problem in it, try to recover it as soon as, otherwise the instrument will damage day by day.
Final Thought
PTO clutch is one of the essential parts of a cub cadet. You should know how to remove the PTO clutch on a cub cadet at home; if you don’t know, try to learn. It will help you more. If you discover it, you will be able to recover or remove it in an emergency.
These will save you money, and you will no need others to help. But remember one thing you must have enough knowledge about every part of this machine. And before start working you must take enough safety for the work.
- How to measure a lawnmower belt – 3 important steps
- How To Sharpen Hedge Trimmer With Dremel: Some Instructions
- Know How TO Get A DOT Number In Pa with Important 3 Things
- How To Sharpen Mulching Blades: An Ultimate Guideline in 10 Excellent Steps
- How To Use Preen With Mulches: 9 Practical Steps
- How To Get Pine Needles Off Mulch: Top 5 Methods
- How To Mow A Steep Ditch: Guidelines With 7 Best Steps