Do you want to know how to start a red max leaf blower? The blower used to blow leaves and other debris on the ground. For the commercial operator, red Max is easily the industry leader in terms of the selection and performance of power blowers. The red Max is famous for commercial purposes.
Wear head, eye along with ear protection. Improper using this machine could cause serious injury. It would help if you did not open or remove safety guards or nets while the engine is running. Stay a safe distance from the machine. Limit the amount of time over around 30 ~ 40 minutes per session.
Keep the total amount of work in a single day below 2 hours or less. Always store the blower and fuel so that there is no risk of leakages or fumes coming into contact with sparks or flames from electrical equipment, electric motors, switches, boilers, and the like.
For storing the blower, choose a space indoors free from moisture and out of the children’s reach.
How To Start A Red Max Leaf Blower: Simple 11 Steps
Before starting this machine, some rules should keep in mind. By following these below- given steps can help you how to start a red max-leaf blower hopefully. These steps will easy to follow and safe all time definitely.
Step:1
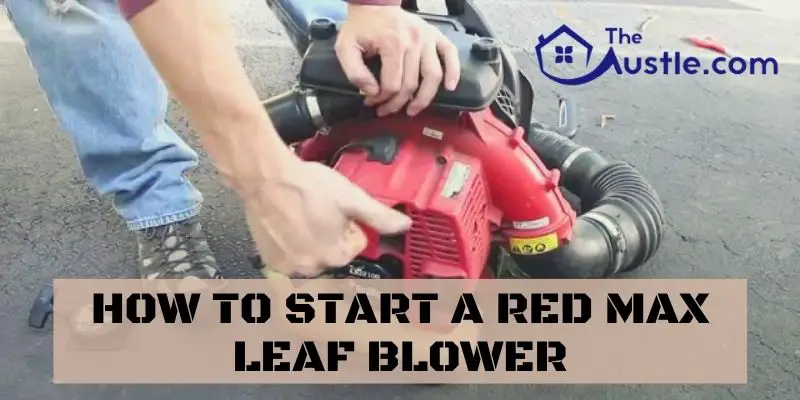
During the processing about how to start a red max-leaf blower, At first, we have to know the Parts of a red Max- leaf blower are; 1. Frame 2 Shoulder Strap 3.Spark Plug Cap 4. Throttle Lever 5. Stop Switch (behind) 6. Net 7. Choke Lever 8 Air cleaner 9.Volute Case -10. “CAUTION” Label 11. Elbow 12.Fuel-tank 13. Recoil Starter 14.
Cruise Control Ignition Switch Lever (RH) 15. Engine- Cover 16. Intake hose 17.Oil 18.Tool Socket. Then connect the blower and pipe with a flexible hose. Then clamp both ends of the flexible tube securely with the hardware supplied with the unit.
When connecting the pipe with the flexible hose, set the “UP” mark on the tube facing upward. Align the protrusion and the groove given on the tube ends and twist the tube until the connection is locked up. Apply grease to the pipes if necessary.
Step:2
In two opposing directions, the pipe end connects with the pipe straight in two opposite directions. In this step, the machine operator can feel a “Lightweight body” than usual and “Higher performance” due to the air stream. Then Set up the clamp to the swivel and tighten the screw on the clamp.
Step:3
In this step, use the clamp to fasten the Colgate tube containing the throttle cable and the hose”s power cable. Then hold the upper end of the control arm in hand and, while pulling it away from the unit, rotate the arm forward until it clicks. You can rotate arm more forward until it clicks.
Choose the arm position according to your working condition. To fold the arm, reverse the order.
Step:4
in this step, you should avoid operating the blower with the flexible tube and swivel jointly. It will reduce the cooling air. The engine could be damaged by overheating. Then push the primer bulb until fuel flows out in the clear tube.
When the engine is cold, close the choke. Choke Level Set the cruise-control ignition switch lever to the start position. Set the cruise control -ignition switch lever in about 1/3 open place. For starting, hold the top of the blower.
Step:5
Pull the starter knob slowly until it engages and then give it a vigorous, steady pull. Avoid pulling the starter rope out to its full extent for allowing the starter rope to snap back to prevent premature damage to the starter. When the engine is running, gradually open the choke if it was set closed.
Keep in mind that the engine runs at idle speed for a minute to warm it up.
step:6
At first Pull-on the end of the strap. Then pull up on the lower portion of the buckle with a finger. And then slide the end of the strap back up to the buckle.
Step:7
for Pull up on the lower part of both strap buckles to loosen the straps in an emergency. The speed of idle is adjusted for 2000 rotations per minute at the factory. By using the adjustment screw on the top side of the carburetor, adjust the idle speed. Idling Adjustment Screw STOPPING ENGINE.
Step:8
In this stage of how to start a red max-leaf blower, Move the throttle lever to the idling position and press the stop switch. When the machine pushes the stop button, the plug will not give off sparks until the engine stops. Move the switch lever to the idling position. Then set it to the stop position.
Step:9
When the engine will not stop when setting the ignition switch to the stop position, close the choke lever and stop the engine. In this case, please repair the machine at your nearest servicing dealer.
Make sure that the driver has stopped. Keep it fresh before performing any function to the blower. Contact with a rotating blower fan or hot muffler may result in a personal injury. Never operate the blower without an air filter or with a deformed or broken filter element because unfiltered dusty air will quickly ruin the engine.
Check the air cleaner before use. Never clean a paper filter by striking it with or against another object. The screen may be damaged, and resultant dust contamination can diminish engine performance. Unscrew two-knob bolts and remove the air cleaner cover.
Then remove a prefilter mounted inside the air cleaner cover Wash the prefilter in a new, non-flammable cleaning solution and then dry. Clean the air filter once a week. Exchange the paper filter element with a new one. Never wash the prefilter in an oleaginous cleaning solution.
Do not clean a paper filter by striking it. Poor acceleration of the engine may cause a clogged fuel filter. Check regularly to see if the screen is clogged.
Step:10
The filter of the fueling port can remove by a wire hook and then disconnect the filter assembly from the fuel pipe. Then unhook the retainer to disassemble it. Clean the components with gasoline. The spark plug may collect carbon particles on its firing end. Remove and inspect the spark plugin every 25 hours. We need to wash the electrodes with a wire brush.
Inspect the muffler for loose fasteners, any damage. If any exhaust leakage is found, do not use the blower. It needs to repair it immediately.
step:11
It is necessary to ensure that the spark arrester and the diffuser are adequately attached with four bolts. If one of seven bolts is getting loose, it may cause in engine catching on fire.
Every 100 hours after use Remove the muffler, insert a screwdriver into the vent. Remove any carbon buildup on the muffler exhaust vent. Tighten all screws, bolts, and fittings. When airflow has dropped down during operation, stop the engine and inspect the air inlet net for blocking by obstacles.
If the gap is out of standard or when installing the coil or rotor, adjust the air gap between the ignition coil. If the shoulder strap is cracked or damaged, it may break while working. That will cause the product to fall and resulting in personal injury.
Conclusion
Take off the clip from the belt. Then Pass the end of the strap through the hanger. Return the clip to the belt. Drain a fuel tank. Push the primer bulb until otherwise, it becomes empty of fuel. Remove the spark plug. Store unit in a dry, dust-free place, out of the reach of children.
When disposing of your machine, fuel, or oil for the device, be sure to allow your local regulations during the procedures on how to start a red max-leaf blower. For the planning of the work schedule, you need plenty of time to rest.
- How To Bid Commercial Landscaping: Know The Best Tricks In 2021
- How To Keep Grass Out Of The Pool When Mowing In 2 Best Ways
- How To Bid A Paver Patio | An Elegant Outdoor Living Project in 3 Easy Steps
- 10 Unique Ways Is How To Dispose Of Grass Clippings: Best Options
- Want To Know How To Rotate Trailer Tires? Do Not Miss Easy 7 Steps
- Best Ways In How To Remove Grass From A Dirt Infield
- How To Grade A Yard With A Tractor | Best Guide With 13 Steps