A cedar fence will work like as you and your property security guard. If you stay peaceful and quiet and take your property safe, you need a wall. And also, a cedar fence will make attractive your home or property’s backyard.
For making a protection fence, planning is an essential thing. So, at first, you should make cedar fence planning. But if you don’t know “How to Treat Cedar Fence,” you can’t make a cedar fence perfectly. In this context, we try to discuss in detail making a cedar fence.
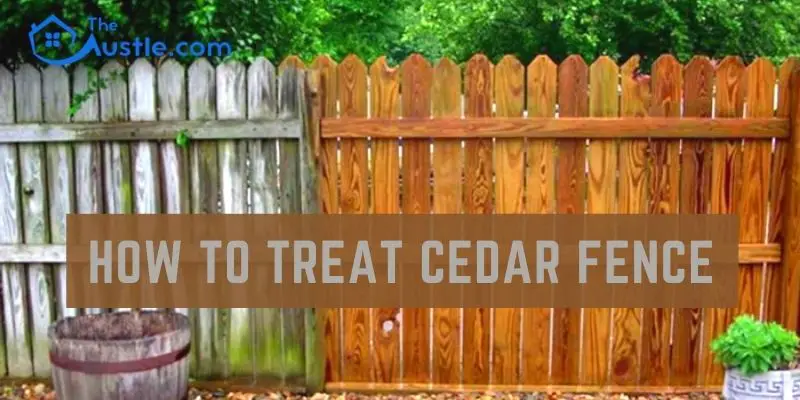
How To Treat Cedar Fence
To make a cedar fence, you will need these things like treated cedar lumber, 3 inches, and 4 inches wood screws, nails, electric drill, nail gun, a post hole digger, measuring tape, straight edge, level, wooden stakes, string, wheelbarrow, shovel, water, local building codes, etc. let’s go for details.
Step-1: Point Out Your Fence Property-For Line
At first measure, your lands end where you want to make a cedar fence. Whenever you come across buried marker pins with a metal detector will beep. Any how property stakes are driven above ground so then a colored flag will make them plainly visible.
- For solving in future trouble, inquire about your area with local authorities for codes and permitting.
- Call surveyor out to have a look to sure without any dubiety.
- If you build your fence in the wrong place, you could be subjected to a fine.
Step-2: Fix Your Fence Tallness
Making fence primary purpose is depend on the high of your fence need. Taking some thought into your specific needs will allow you to buy just the right amount of materials and avoid wasteful overspending.
- Generally, a protection fence should be at least 5.5 feet tall in order to remain others from being capable to see into your property.
Step-3: Clear The Fence Building Area
You should clear that area on both sides of the fence location and level the land as best as possible.
Step-4: Drive Pillars Where Your Fence’s Support Columns Will Go
Laying out the rest of your support posts after setting your corner posts. Drive two temporary steel posts to help you stake the fence. Tie a string between the posts at the top and bottom to act as guidelines.
- You could also use marking paint instead of stakes, as it would avoid creating a trip hazard.
- Take into consideration any gate posts, bracing posts for gates, and corner posts as well.
Step-5: Make Holes For The Posts
Make holes for the posts by using a manual post hole digger. Generally, for a standard privacy fence, each of the post holes should be approximately 3 feet deep.
- Be sure to measure the posts you are working with so you will know exactly how deep you will need to dig.
- Since gate and corner posts are often larger in diameter, they should be placed far enough in the ground to support the weight of the gate and bracing.
Step-6: Pour Concrete Into The Bottom Of The Post Holes
Add roughly 5 inches per hole. You can use a mixture of aggregate, gravel, and sand for a more firmly-packed substrate.
Step-7: Insert The Posts Into The Holes
Recheck that the posts are perfectly straight by plumbing them on both sides with a level. Take pillars one by one and insert this into the holes.
Double-check your measurements often and before your concrete sets. Cedar posts can be quite heavy, so you may need a couple of extra sets of hands for this step.
Step-8: Fill The Space With Early Set Concrete
Take quick set concrete and mix this with a wheelbarrow. Shovel the wet concrete into the free space around each post. It will take at least 20 minutes for the concrete to set. It will take another 24 hours for the concrete to cure.
Draw lines on the lower edge of the top rails and the upper edge of the bottom rails. This will allow us to keep an eye-hole on them while positioning the rails. Be sure to measure, mark each post separately.
Step-9: Attach The Rails With Screw And Circular Saw
Position the rails at the appropriate height and use a level to make sure they are not lopsided. Then attach these rails with wood screws.
Fire up the circular saw and cut away the access wood so the rails are even with the support posts.
Step-10: Join The Pickets
Join the pickets at the same height. Be sure to use a level for vertical straightness. You can space the pickets evenly. It is a good idea a thin spacer piece of scrap plywood, to keep the pickets at regular intervals.
Check the placement of the pickets then nail or screw them to the horizontals rails permanently. Use two nails or screw for each rail to reinforce the joining side and make sure the fence holds up for a good long time.
Cedar fence is ready
Use Protective Finish
Using a pump sprayer or an airless paint sprayer and work one section at a time, aiming for full coverage, and go over both sides of the fence.
Learn More
- Make sure your fence is in compliance with local ordinances and other regulations. Like as, homeowner’s association guidelines.
- Be prepared to dedicate at least one entire weekend to the project, depending on the amount of ground you have to cover.
- For board placement and fastening, you will need one or two helpers because these might be too unwieldy to handle on your own.
- It is recommended that a 24 hours concrete cure time be allowed on pillars before hanging any rails, pickets, or gates as it can cause posts to possibly move.
Finishing Words
After reading this content, we hope, now you learn perfectly about “How To Treat Cedar Fence” and now you are confusion-free. Afterward knowing in detail, you can start making your protection fence by yourself. By making yourself, it saves you money and you will get a new experience. So, let you start.
Best wishes to you and also thank you to read this article.